One of the most common questions we get from people is “what settings should I use for astrophotography?”
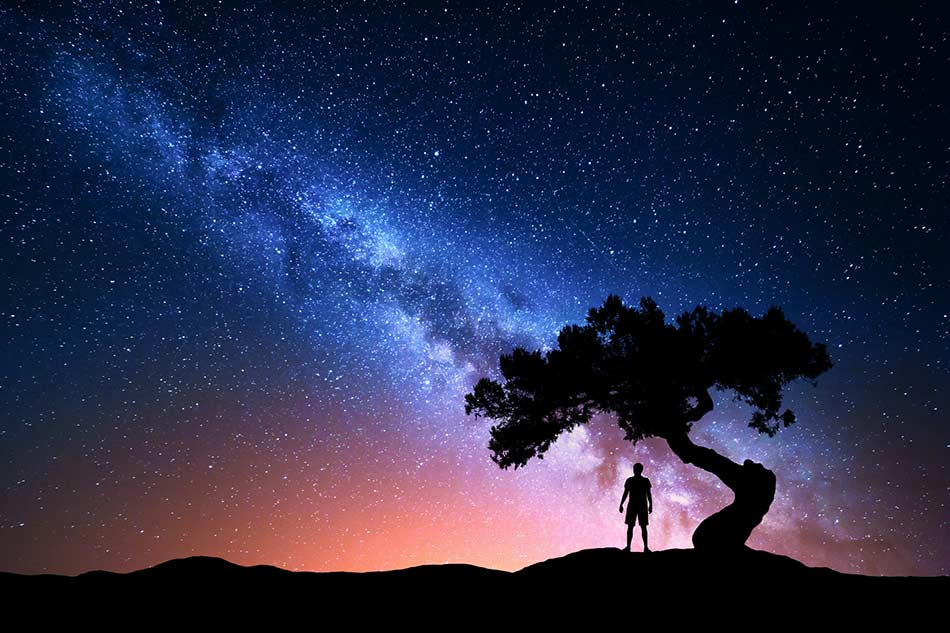
If you’ve never really shot Milky Way photography before, then you’re going to love this!
The first thing you need to do is find somewhere with very little light pollution, and head out to take photos within a few days either side of the new moon so you can really see the stars.
Then it’s time to take some long exposure pictures!
Astrophotography Settings Cheat Sheet
- Use Manual Mode
- Aperture – f/2.8 (or the smallest number your lens can go)
- Shutter – 25sec
- ISO – 3200
- White Balance – Auto
- Manually Focus on Brightest Star
- Focal Length – 16/20/24mm
- File Type – RAW
- Self Timer – 2 seconds
- Long Exposure Noise Reduction – Off
- Place Camera on Tripod
If you head outside on a clear night, set your camera up on a tripod, point it at the Milky Way and use these settings, you should be able to capture a fantastic image that you can be proud of.
Of course there are a lot of different elements that come into play that would affect the end result, and as soon as you start to get a bit more experience you’re going to want to experiment with different settings for astrophotography.
But if you follow the above guide you’ll be off to a good start!
Now let’s dive into why we choose these particular astrophotography settings.
Aperture – Large
In basic terms, aperture is the opening at the front of the lens that lets in light.
The wider, or larger, the opening is, the more light can come through and hit the sensor. The smaller the opening is, the less light comes through.
Besides the amount of light it lets in, it also affects the depth of field of the image.
- Wide aperture = shallow depth of field.
- Small aperture = long depth of field.
That last part is very important to learn about, but for now we’ll talk about the light side of things.
Because you need to be shooting astrophotography when it is dark outside, there isn’t much light available for the sensor to read.
So you need to help the camera get the most light available by making the aperture as wide open as possible.
Great astrophotography lenses will be able to open up as wide as f/2.8, or even wider (f/1.8, f/1.4, etc).
Considerations
When you’re shooting at a wide aperture the depth of field is going to be very narrow. That means when you focus on the stars, the foreground will be a little bit blurry. Something to remember.
Shutter Speed – Slow
Shutter speed is how long the shutter on your camera remains open, which directly affects how long light is being registered on your sensor.
It also has other effects on photography, such as the ability to introduce motion blur, but for astrophotography settings we’re going to focus on the light side of things.
The longer your shutter is open, the more time the faint light from the stars has to embed itself on your image.
For the purpose of night sky astrophotography, aim to have your shutter open for around 25 seconds to start with.
This gives ample time for the stars to show up on your photo.
Considerations
While your shutter is open your camera needs to be perfectly still so you don’t introduce any motion blur to scene. That’s why you use a tripod.
A slow shutter speed can also result in faint (or large) star trails thanks to the earth rotating.
How long your shutter speed can stay open without seeing any star trails is directly related to your focal length, which we dive into below under ‘The 500 Rule’.
But for beginners just remember that as long as you’re using a wide angle lens, somewhere around 25 seconds as a shutter speed will be fine.
ISO – High
“What ISO should I use for night sky photography?”
In the most basic terms, ISO affects how sensitive your camera sensor is to light, which directly affects the brightness of an image.
A low ISO (such as 100) means that the sensor isn’t very sensitive to light, and will result in a darker image, depending on your camera settings.
A high ISO (such as 3200) will make your sensor more sensitive to light, and will result in a brighter image.
When you’re taking a photo of the night sky, you want your image to be bright. That’s why you want to turn your ISO up high.
In almost all other styles of photography, especially landscapes, you want your ISO to be as low as possible. But astro is different.
Considerations
A higher ISO results in grain, or noise, showing up on your photo. This drastically affects your image quality.
High-end professional cameras can handle higher ISOs really well, while cheaper cameras often struggle with that.
You can fix the issue with some noise reduction when editing the photo, but you can never get the image as sharp and clean as shooting with the lowest ISO possible.
White Balance – Auto
The white balance is what kind of colour tinge your image has. It can be warmer (yellows/oranges) or cooler (blues/purples), depending on the number you set, known as Kelvin.
There is no perfect white balance for Milky Way photos. It all depends on your own personal style and what you like. But if you don’t know where to start, we recommend leaving it in auto.
This lets your camera choose the white balance automatically using a computer algorithm, and is one less thing to worry about.
But if you’re shooting in auto white balance (AWB), there’s one big tip we have for you!
Shoot in RAW.
This allows the image to maintain all the colour details without compression, so you can adjust it to whatever you like later in a program like Adobe Lightroom without damaging the photo.
Considerations
Cameras often struggle with getting the perfect white balance for night photos when set to auto, and you may end up with a warmer image than you like.
If you’re shooting in RAW, it’s not so much an issue as you can fix that later. But to save time and get the image as close to perfect, we do recommend setting your white balance ahead of time.
We personally prefer cooler night sky images, as it looks more natural. A number around 3200K is a good place to start.
Remember – SHOOT IN RAW!!!
Focus – Manual
When you’re taking a photo of the Milky Way, you usually want the stars to be sharp and in focus.
New cameras have fantastic auto focus capabilities, but even the best, most expensive cameras struggle with focusing when it’s pitch black outside.
Get rid of the margin for error by switching your camera to manual focus and adjusting it to make sure the stars are sharp.
As a tip to help with this, focus on the brightest star (it’s easier to see), and use focus magnification if your camera has this feature.
Considerations
Manually focusing on stars takes time to get right, and unfortunately it’s not as easy as just setting your focus ring to ‘infinity’ and forgetting, as every model of lens is slightly different.
One thing you can do is mark on your lens with a bit of tape where true infinity is so you can find it quicker out in the field.
Focal Length – Wide
A wide angle lens (think 16mm for full frame cameras, 10mm for APS-C cropped sensors) allows you to fit in as much sky and foreground in one shot as possible.
The wider the focal length, the less chance you have of capturing slight star trails on a long exposure too, thanks to the 500 Rule.
Considerations
Shooting with a wide lens does require care when composing your shot, thanks to things like lens distortion on the edges of the frame.
But just like anything, practice makes perfect.
Wide shots also make the Milky Way look quite small compared to whatever is in the foreground.
File Type – RAW
In order to get the most detail and possibilities for editing in your photos, you need to be shooting in RAW format, rather than JPEG.
RAW is a file type that doesn’t use any (or very little) image compression, meaning a lot more details are maintained in the colours, shadows and highlights.
This gives you lots of power when editing, and we highly recommend you get used to shooting in RAW.
Considerations
RAW files are larger, so you need more storage. Make sure you have ample space on your SD cards and hard drives.
RAW files also need to be post processed using software like Adobe Lightroom before you can print or share them.
Self Timer – 2 Seconds
In order to get a still, sharp long exposure image without any motion blur, you need to use either a remote shutter release or a timer delay.
Remotes are great, but obviously are an extra accessory that costs money.
Using the cameras in-built time delay is free and can achieve the same result.
Just place your camera on a tripod, select a self timer (2 seconds is usually adequate, but you can push it out to 5 or 10 seconds if you prefer), hit the shutter then wait for the camera to do its thing.
Long Exposure Noise Reduction – Off
A lot of cameras have an in-built feature called ‘long exposure noise reduction’. This is basically an algorithm that automatically tries to eliminate any noise created from shooting long exposures at high ISO.
Sounds great in theory, but cameras just aren’t that good at it (yet), and will never be as effective as doing it manually when editing your photo.
It also doubles the length it takes to take a photo, as you have to wait for the camera to work its magic after the shot is taken.
Do yourself a favour and turn this off.
Recommended Gear for Astrophotography
Now that you know all the astrophotography settings to use to take pictures of the Milky Way and night sky, you need to make sure you have the basic camera gear to achieve the best results.
Don’t stress – you don’t need to go out and buy the best cameras on the market if you don’t want to!
In fact you can take astro photos using smart phones and GoPros these days.
But if you want to get better results, you’ll need at least the following items.
Mirrorless or DSLR Camera
Mirrorless and DSLR cameras are perfect for astrophotography, as they allow you to use interchangeable lenses, have manual photo modes and usually have better low-light performance than point-and-shoot cameras.
We personally use and recommend Sony full-frame cameras like the A7iii or A7Riii, but you can start off with any model that fits your budget.
Fast Wide Angle Lens
A wide angle lens lets you capture as much of the Milky Way as possible, and if it’s fast (has a wide aperture like f/2.8), you can let more light into the sensor with a lower ISO.
If you’re shooting on an APS-C camera, look for a lens around 8-12mm.
On a full-frame, look for something between 12-24mm.
Tripod
Almost as important as the camera, and completely essential when it comes to astrophotography.
A tripod will let you position the camera on something stable, removing any chance of camera shake caused by your hand moving when using a slow shutter speed.
Leave a reply


Leave a reply